When it comes to water-damaged floors, quick action is crucial. As someone who’s spent over 25 years dealing with Timber, Laminate and Bamboo flooring issues, I can say that the first 24-48 hours are critical for preventing long-term damage to your floors.
Whether dealing with water under floorboards from a burst pipe or trying to figure out how to fix water-damaged swollen wood flooring after a spill, the key is identifying the problem quickly and taking immediate action.
Having worked with some of Queensland’s largest builders dealing with insurance claims and spent years in acoustic engineering, I’ve seen firsthand how water-damaged floorboards can affect not just the visible surface but the entire structural integrity of your flooring system.
Let me share some of that expertise with you.
Quick Reference Guide
- Immediately remove standing water and dry the area
- Look for signs of water damage on hardwood floors, including cupping, crowning, and discolouration
- Assess whether it’s a DIY fix or requires professional intervention
- Begin the drying process within 24 hours to prevent mould and structural issues
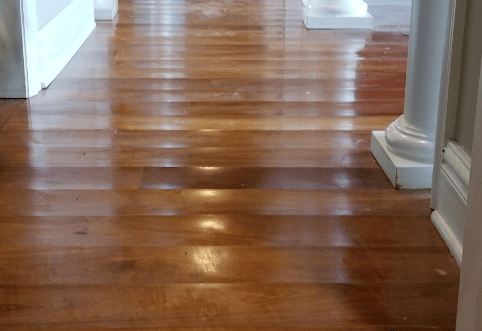
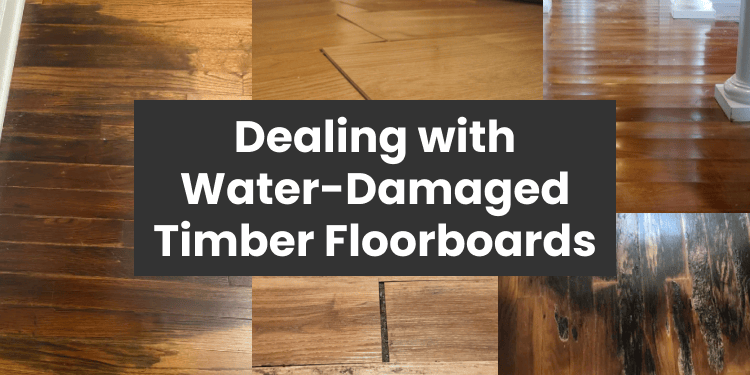
Timber floorboards show cupping, with a visibly uneven surface due to water damage.
Expert Insights From Levi Saunders
Online Retail Specialist & Flooring Content Creator
Timber Flooring Types
Before diving into water damage, it’s essential to understand that ‘timber flooring’ refers to solid timber and engineered timber products. Having worked with both, I can tell you that each responds differently to water exposure because of their anatomy.
- Solid timber flooring is milled from a single piece of timber
- Engineered timber combines actual timber layers with specialised core materials
Understanding Water Damage in Timber Flooring
Common Causes
In my experience working with flooring solutions, water damage rarely comes from the dramatic events you might expect.
While flood damage indeed happens, I more commonly see damage from:
- Leaking pipes beneath the surface
- Overflowing pet water bowls
- Excessive mopping or cleaning
- Rising dampness from subfloor issues
- Appliance malfunctions
- Indoor plant overwatering
- High humidity levels (particularly relevant in Queensland)
- Air conditioning condensation
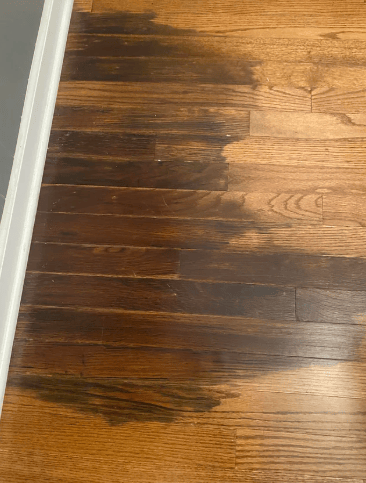
Dark discolouration on timber floorboards caused by moisture seeping up from a wet subfloor.
Signs of Water Damage
When homeowners ask me how to remove moisture from floor surfaces, I help them identify the warning signs. Here are the key indicators I look for.
Immediate Signs:
- Cupping or crowning of boards
- Dark staining at board edges
- A musty smell
- Squeaking or movement when walked on
- Springiness underfoot
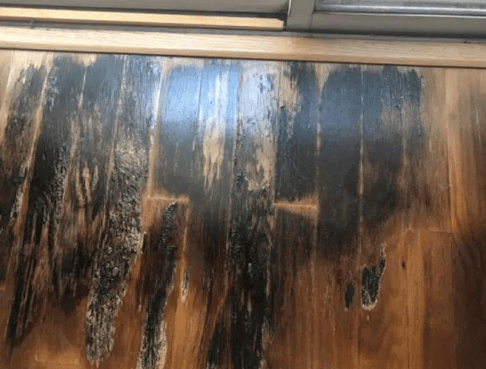
Timber floorboards with visible mould growth and blackened areas from severe water damage.
Progressive Signs:
- Mould growth (often starting at board edges)
- Separation between boards
- Change in floor level
- Discolouration that worsens over time
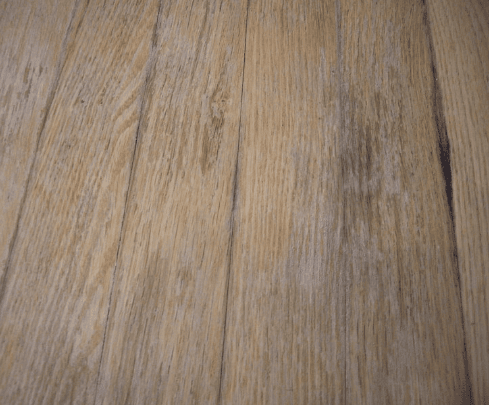
Water-damaged timber floorboards showing patches of discolouration and fading.
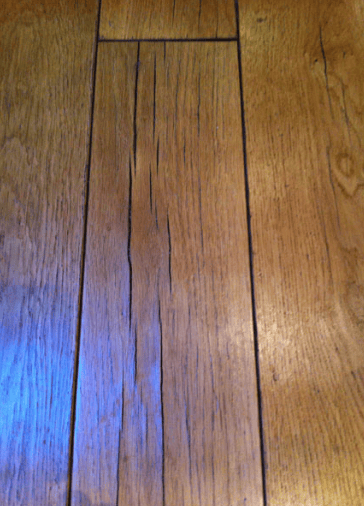
Wooden floorboards split and separate along the edges due to water exposure.

Expert Insights From Clem Sturgess
20+ years' experience in hard flooring
And yes, for those wondering, “Can yellow tongue flooring get wet?”. While it’s designed to resist moisture to some degree, prolonged exposure to water will eventually cause problems, especially if it’s not sealed correctly.
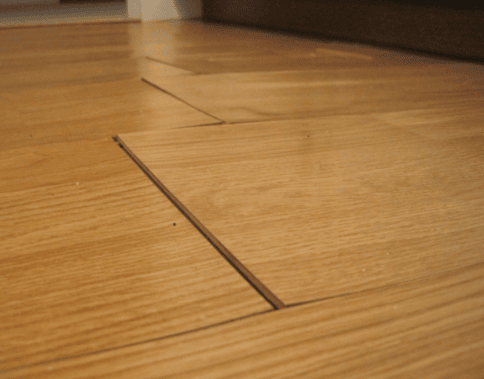
Floorboards with misaligned edges and gaps caused by moisture damage
Impact of Damage Severity Assessment
Assessing water-damaged floorboards isn’t just about what you can see on the surface. When evaluating water under floorboards, we need to consider several critical factors that I’ve seen make or break a restoration project.
Type of Timber and Installation
Having worked extensively with different timber species across Australia, I can tell you that each responds differently to moisture.
Some key considerations:
- Solid hardwoods tend to be more resilient but can warp significantly
- Engineered timber might show less immediate damage but can delaminate
- Floating floors tend to show damage more quickly than direct-stick installations
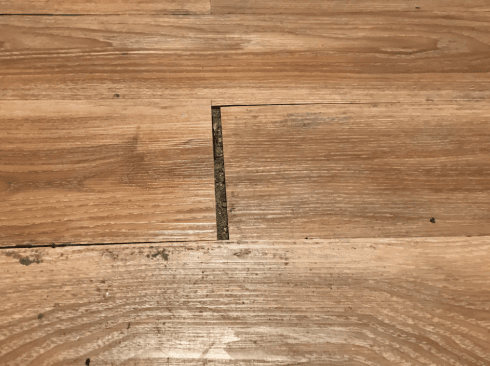
Floorboards with noticeable gaps and misalignment caused by prolonged water damage.
Time and Exposure Factors
Through my experience, I’ve observed these crucial timing elements:
- Duration of water exposure
- Time elapsed before discovery
- Type of water (clean, grey, or black)
- Ambient temperature and humidity
- Subfloor construction and condition
Immediate Response Guide To Water-Damaged Flooring
First 24 Hours – Critical Actions
When people ask me how to fix water-damaged floorboards, I emphasise that time is crucial.
Here’s my tried-and-tested emergency response protocol:
Stop the Water Source
- Identify and stop any active leaks
- Turn off the water supply if necessary
- Remove any standing water immediately
Initial Assessment
- Document the damage (photos are essential)
- Mark the extent of affected areas
- Check for water migration beyond visible areas
Begin Drying Process
For those wondering how to remove moisture from floor surfaces effectively:
- Use commercial-grade dehumidifiers
- Position fans strategically
- Remove affected skirting boards if necessary
- Create air circulation under boards where possible
Restoration Process and Cost Considerations
The Professional Approach
Properly fixing water-damaged floorboards requires a systematic approach and often requires partial or total assistance from industry experts.
Here’s what they can do and estimated associated costs, which can vary for each situation:
Assessment and Planning
Moisture Level Testing
- Surface moisture readings
- Subfloor moisture content
- Relative humidity assessment
- Core sampling when necessary
Structural Assessment
- Subfloor integrity check
- Joist condition evaluation
- Acoustic membrane inspection (particularly crucial in multi-res buildings)
- Assessment of water-damaged swollen wood floor areas
Professional Restoration Steps
Controlled Environment Creation
- Industrial dehumidification setup
- Temperature regulation
- Airflow management
- Humidity monitoring systems
Systematic Drying
- Targeted drying zones
- Moisture content monitoring
- Subfloor ventilation enhancement
- Progressive moisture mapping
Cost Breakdown
Emergency Response (First 48 Hours)
- Professional assessment: $250-$500
- Emergency water extraction: $400-$800
- Initial drying equipment setup: $500-$1,000
Restoration Costs
- Minor surface restoration: $50-$80 per m²
- Partial board replacement: $90-$140 per m²
- Full section replacement: $140-$250 per m²
- Subfloor remediation: $60-$120 per m²
Additional Cost Considerations
- Acoustic membrane replacement: $40-$80 per m²
- Moisture barrier installation: $30-$50 per m²
- Skirting board replacement: $15-$30 per linear metre
- Post-restoration testing: $200-$400
Prevention Strategies and Future-Proofing
Over the years, particularly in Queensland’s challenging climate, I’ve developed rock-solid strategies to prevent water damage to floorboards.

Expert Insights From Levi Saunders
Online Retail Specialist & Flooring Content Creator
Acclimatisation of your product is critical for timber flooring before you begin to install. We recommend you read this blog on acclimatising timber floors to learn more.
Daily Practices
- Install quality entrance matting (a small investment I’ve seen save thousands in floor damage)
- Use drip trays under plants (trust me, I’ve seen too many floors ruined by enthusiastic plant parents)
- Keep air conditioning units adequately maintained so there is no dripping onto flooring
- Monitor humidity levels (significant in Queensland)
- Regular inspection of plumbing fixtures
- Cleaning spills from kids and pets quickly
Strategic Solutions
Having worked extensively with moisture issues in multi-res developments, I recommend:
- Professional-grade moisture barriers between flooring and subfloor
- Adequate subfloor ventilation
- Strategic drainage solutions
- Regular maintenance schedules
Maintenance Best Practices
- Inspect your floor regularly for signs of moisture, including monthly checks for signs of water damage on hardwood floors
- Professional assessments as you can afford them if you believe something is wrong
- Immediate investigation of any changes in floor level or appearance
- Professional Maintenance – We recommend the “light cutback” option every 3-5 years to replenish the flooring found in this article refinishing hardwood floors.
- Preventive treatments in high-risk areas
Revolutionary Engineered Flooring
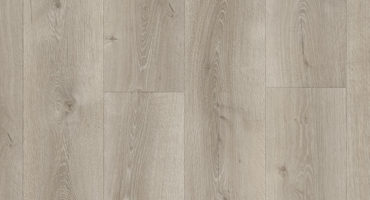
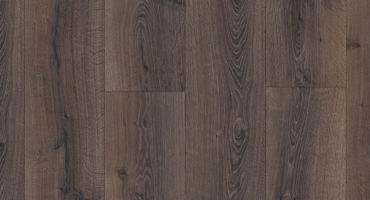
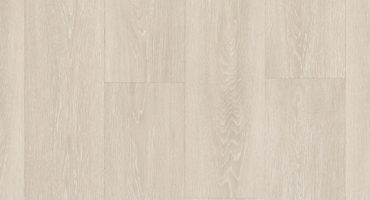
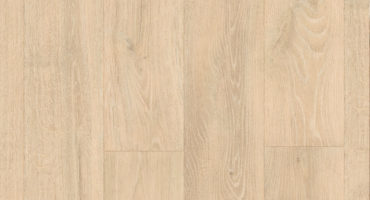
The industry has come a long way since I started. We’re now seeing revolutionary products like Quick-Step Amato by Premium Floors – the first genuinely watertight timber floor I’ve encountered in my 25 years of experience. It’s a game-changer for areas where we traditionally couldn’t use timber.
Having worked extensively with moisture issues, It’s the first authentic timber floor I’ve seen that’s genuinely watertight.
What makes it unique:
- Complete waterproof surface suitable for kitchens and bathrooms
- Available in both European oak and Australian species
- Flexible installation options (floating or direct stick)
- Ideal for smaller spaces like bathrooms and hallways
- Combines real timber aesthetics with modern waterproofing
Best Modern Artificial Flooring Options for Water Resistance
After spending years developing hybrid flooring solutions and seeing the evolution of water-resistant technologies, here are my top recommendations for other flooring types:
Hybrid Flooring
Resiplank Summit Hybrid by Terra Mater Floors
High-Performance Laminate
Quick-Step Majestic Laminate by Premium Floors
Shield Everlast Laminate from Clever Choice
Vinyl Plank Flooring
Naturale Planks 5.0 by Imagine
Resiplank Adore by Terra Mater Floors
Having worked with these products across numerous Queensland projects, I can tell you that each offers excellent water resistance while providing different benefits in terms of durability, aesthetics, and acoustic performance.
Managing water-damaged floorboards is all about quick action and professional assessment. The key is catching issues early; those initial signs of water damage on hardwood floors can be subtle, but addressing them promptly can save thousands in repairs.
Whether dealing with water under floorboards or trying to figure out how to fix a water-damaged swollen wood floor, remember that prevention is always better (and cheaper) than cure.
FAQ
While water-damaged laminate flooring can be repaired by replacing affected boards, it’s not always that simple. Successful restoration depends on several factors.
First, we need to identify and fix the water source. Then, critically, we must assess both the visible damage and the subfloor’s condition. Many homeowners don’t realise that even if surface boards look okay, moisture in the subfloor can cause problems months later. Board replacement might suffice for minor damage, but extensive water damage often requires complete replacement with a more water-resistant option like hybrid flooring.
When water gets under hardwood floors, immediate professional intervention is crucial. I’ve seen too many DIY attempts make the situation worse.
The process requires:
- Professional moisture assessment
- Controlled drying of the subfloor
- Proper acclimatisation before reinstallation
- Expert restoration techniques
While tiles remain the most waterproof option for wet areas, the flooring industry has made remarkable advances in water-resistant technologies. However, it’s not as simple as choosing the most waterproof option – you need to consider your specific situation.
For timber-look options, I recommend considering these flooring types in order of water resistance:
- New Generation Waterproof Engineered Timber
The latest generation of engineered timber flooring combines authentic timber surfaces with waterproof core technology, making it suitable for most home areas, including kitchens. Be sure to ask your retailer about this as it is very new to the market. - Hybrid Flooring
Combining the best elements of laminate and vinyl, hybrid floors offer excellent water resistance and durability. These 100% waterproof floors are ideal for families and high-traffic areas. - Luxury Vinyl Planks
Made entirely from synthetic materials, vinyl planks provide superior water resistance and are perfect for areas prone to spills. However, water can still seep through joins to affect the subfloor. - Water-Resistant Laminate
Modern laminate flooring has evolved significantly, with many options now featuring enhanced moisture resistance through improved core materials and sealing technology.
The key is understanding that water resistance isn’t just about the surface material. Proper installation and subfloor preparation are equally crucial for long-term protection. In my experience, even the most waterproof flooring can fail if not installed correctly with appropriate moisture barriers and sealing.
Water damage recovery depends greatly on the type of bamboo. Strand-woven bamboo is more resilient than traditional bamboo, but both can be salvaged if caught early. The key is immediate action and assessing the extent of swelling and discolouration.
Minor water exposure might be resolved through controlled drying and refinishing, but extensive damage often requires board replacement. Most importantly, bamboo needs proper acclimatisation before and after any water damage repair to prevent further issues.
While vinyl planks are marketed as waterproof, they’re not indestructible. In my experience, the biggest issue isn’t usually the planks themselves but water seeping through the seams to the subfloor. If you catch it early, vinyl planks can often be removed, the subfloor dried, and the same planks reinstalled a significant cost saving.
However, replacement is necessary if the planks have begun to curl or separate at the edges. One advantage of floating vinyl installations is that we can often replace just the affected area rather than the entire floor. Always check the warranty, though some manufacturers void coverage if water can sit for extended periods.
About the Author
Clem Sturgess is a leading expert in hard flooring with over 25 years of industry experience. Specialising in acoustic solutions and water damage prevention, Clem has worked with Queensland’s biggest builders and pioneered solutions in multi-res developments. His unique background in acoustic engineering brings an unmatched perspective to floor protection and restoration.


